

Once Labor Day comes and goes, I instantly leap in to Fall decorating mode. I’m apparently not the only one – my Pinterest feed is absolutely littered with cozy images, pretty colored leaves and mugs of warm drinks.My goal this week is to start hauling out my Fall decorations. Decorating the house is such fun! But I sometimes struggle with the front porch.I’m resurrecting one of my very first posts, because it’s timely! It’s this awesome Raffia Wreath from the Stone Gable blog. I’ve made this wreath two years in a row, and will definitely be doing it again. It is really easy to make and looks so festive when it’s done! It transitions nicely from early Fall all the way through Thanksgiving.
The instructions from Stone Gable are helpful! But I’ve added my own tips below.
You can find all the materials at your local craft store:
1 large bag natural raffia
1 18″ straw wreath (don’t remove the plastic!)
~50 floral u pins
Scissors
Here are the materials, ready to go! (Plus coffee. Always better to craft with coffee).

You’ll see 3 bags of raffia in the above picture. The first year I made this wreath, I used almost 3 bags. Last year, I only needed one bag. The wreath wasn’t as full, but it looks so much better!
I recommend doing this project outside. It can get a tad messy. But, with that being said, this wreath isn’t supposed to look perfect. It needs to look untidy.
I don’t use the glue gun as Stone Gable suggested. I just don’t think it’s necessary.
Another tip is to alternate the length of the bundles you create. This will help the “messy” look that makes this wreath so great!
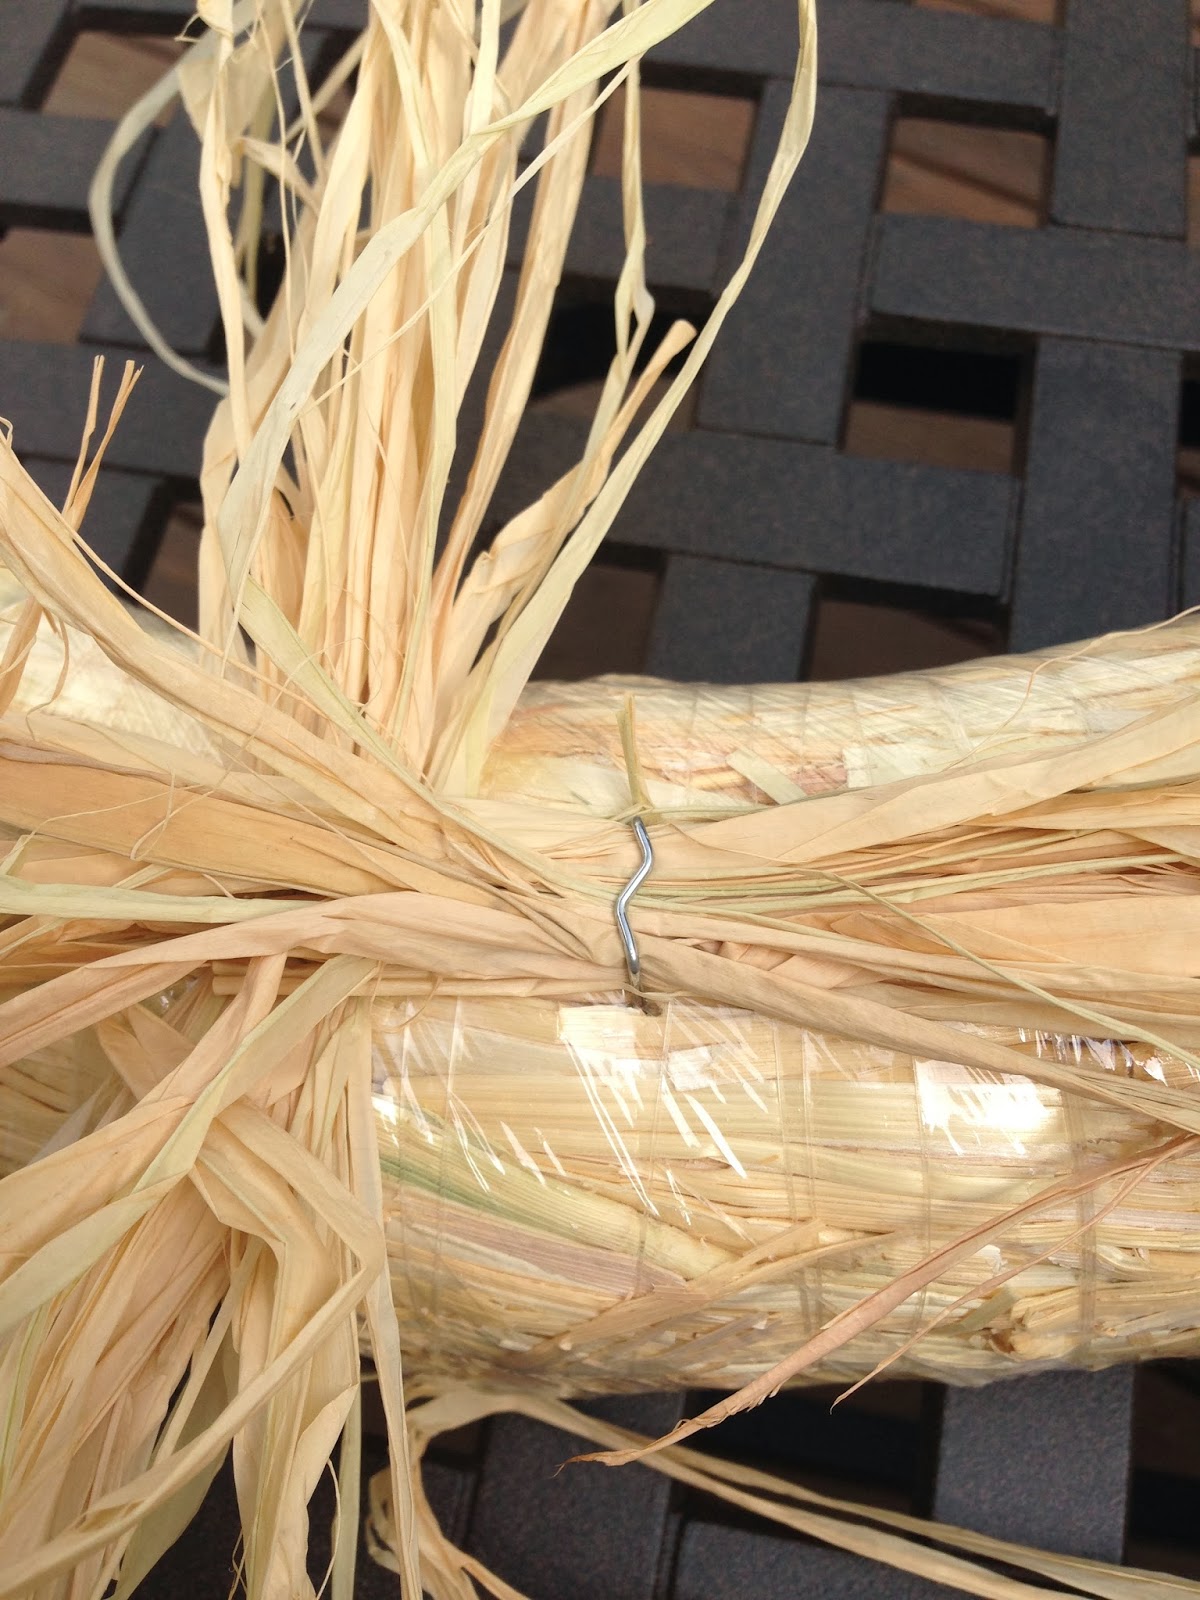
To start, overlap your bundles, one horizontal, then the next vertical. Pin the next bundle close-ish to the previous bundle.
Once I have my first 5 or so bundles pinned down, I take my scissors, cut the loops, and check the spacing and coverage. If it looks good, keep going around the wreath! If you’re noticing gaps or can see the pins, pin your bundles closer together OR make your bundles smaller. Sometimes, the more loose your bundle and the larger the loops, the more gaps there are.
You will be VERY fussy with it for the first few loops. Then once you get in a rhythm, you will get faster and not be as careful about being neat. This is critical – don’t try to make it neat. It looks so much better when it’s messy and a little random.
Once you get all the way around the wreath, hold it up and start snipping the loops. You don’t have to worry about snipping all the loops! I just randomly hacked away. I like leaving some of the loops in tack here and there. You will then want to give your wreath a hair cut 🙂 My first attempt was so full that it ended up looking furry…
You will also want to make sure you can see the center hole of the wreath! The first year my husband commented that the wreath was missing a hole, and looked like a bad doughnut.
This wreath takes about 30 minutes to put together! You could also wire in berries, pinecones, etc. if you want some color too it. But I love the natural look since our door is so dark.
I hope it works for you!! Hurrah for Fall!

Want more Fall fun? Check out my Autumn Pinterest board:
http://www.pinterest.com/ktcupoftea/autumn/
Don’t forget to follow: Instagram | YouTube | Facebook | Google+ | BlogLovin’ | Twitter | Pinterest
What a fun wreath! I asked my husband to bring my fall decor boxes in from the storage shed last night…who cares that it’s 92 degrees outside? 🙂
Exactly! It’s my favorite time to decorate, and it needs to get out early to have it’s fair share of time before Christmas 🙂
You’re so crafty. I like to think that I’ll get around to doing stuff like this, but when I can just go to Michael’s and pick something up that’s pre-made, then that’s what I usually do. I bet there’s such a great sense of accomplishment though when you create your own stuff.
I have quite a few done arrangements from Michael’s too! But this wreath is so easy, even my DIY challenged self can do it!
So gorgeous and so simple! And it won’t die on me. Yay!
Not dying is really important for me too haha!!
How Fun 🙂 I love it
Thank you!!
This is so cute! I’ve never seen anything like this before!
Tif @ Bright on a Budget
It’s really easy! And it looks so loose and fun compared to more structured wreaths.
Love the wreath!
Thank you!
A few days ago I had read your old post about this wreath and immediatly fell in love with the wreath. I have bought all the items that I’m going to need and I hope I can start this project at the next weekend.
Hopefully it will not become one of those projects I want to do, but never start. I think you know what I mean 😉
Oh excellent!! It’s really easy! Don’t be tempted to jam the pieces in really close together, or it looks like a giant creature 🙂 Good luck! It’s once of those projects that once you start, you just HAVE to finish it to see how it turns out!
Such a cute and messy wreath idea! It’s fun to have an imperfect wreath that marches easily through the fall season into winter! Great job! 🙂
Thanks! Yep, it’s one that can’t really be messed up 🙂
Hi, First time getting crafty. 🙂 What do you mean by loops? Am I to fold the bundle at the pin? Do you have any pictures at interim points in the project further out?
I’m using lemongrass cuttings.
Thanks in advance!
Hi Ana! GREAT question!!! I don’t have a pulled-back pic, but here’s what I meant! I took a long section of raffia and just created a little bundle, continuing to fold in half. I kept mine about a foot (or a little less) in length. You should have loops on the ends from the folding. Once you’ve pinned that bundle in place, you cut those loops to create all the strands! Hope that helps!